In order to make sure our Support team understands what it is exactly that you are experiencing and need help with, we recommend sending screenshots of the issue.
If we understand what it is that you see, we can start helping right away.
Screenshot Using a Mobile Device
Screenshot on a Mac
- Press Shift + Command + 4 on your keyboard.
- Click and drag your cursor to select the area of your screen you wish to capture.
- Release your mouse or trackpad button.
Your screenshot is saved automatically as a .png file on your desktop.
Click here for full instruction.
Screenshot on Windows
- Click the Windows Start button (the Windows logo).
Note: On Windows 8.1, hover over the lower right corner of your screen, and select Search). - Type Snip in the search box then select Snip & Sketch or Snipping Tool.
- Click the top left corner of the area you want to snip.
- Drag the cursor down and to the right until the area you want to snip is outlined.
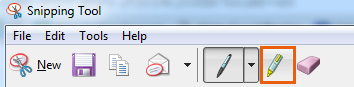
- (Optional) Use the Highlighter to mark an area of the snip.
- Click File from the top menu.
- Click Save as.
- Enter the File name.
- Click Save.
Click here for full instruction.